Begin with nothing in your hands. Look and your palm and imagine a line diagonally down the middle, from the base of your index finger across your palm to the opposite corner (see image 1).
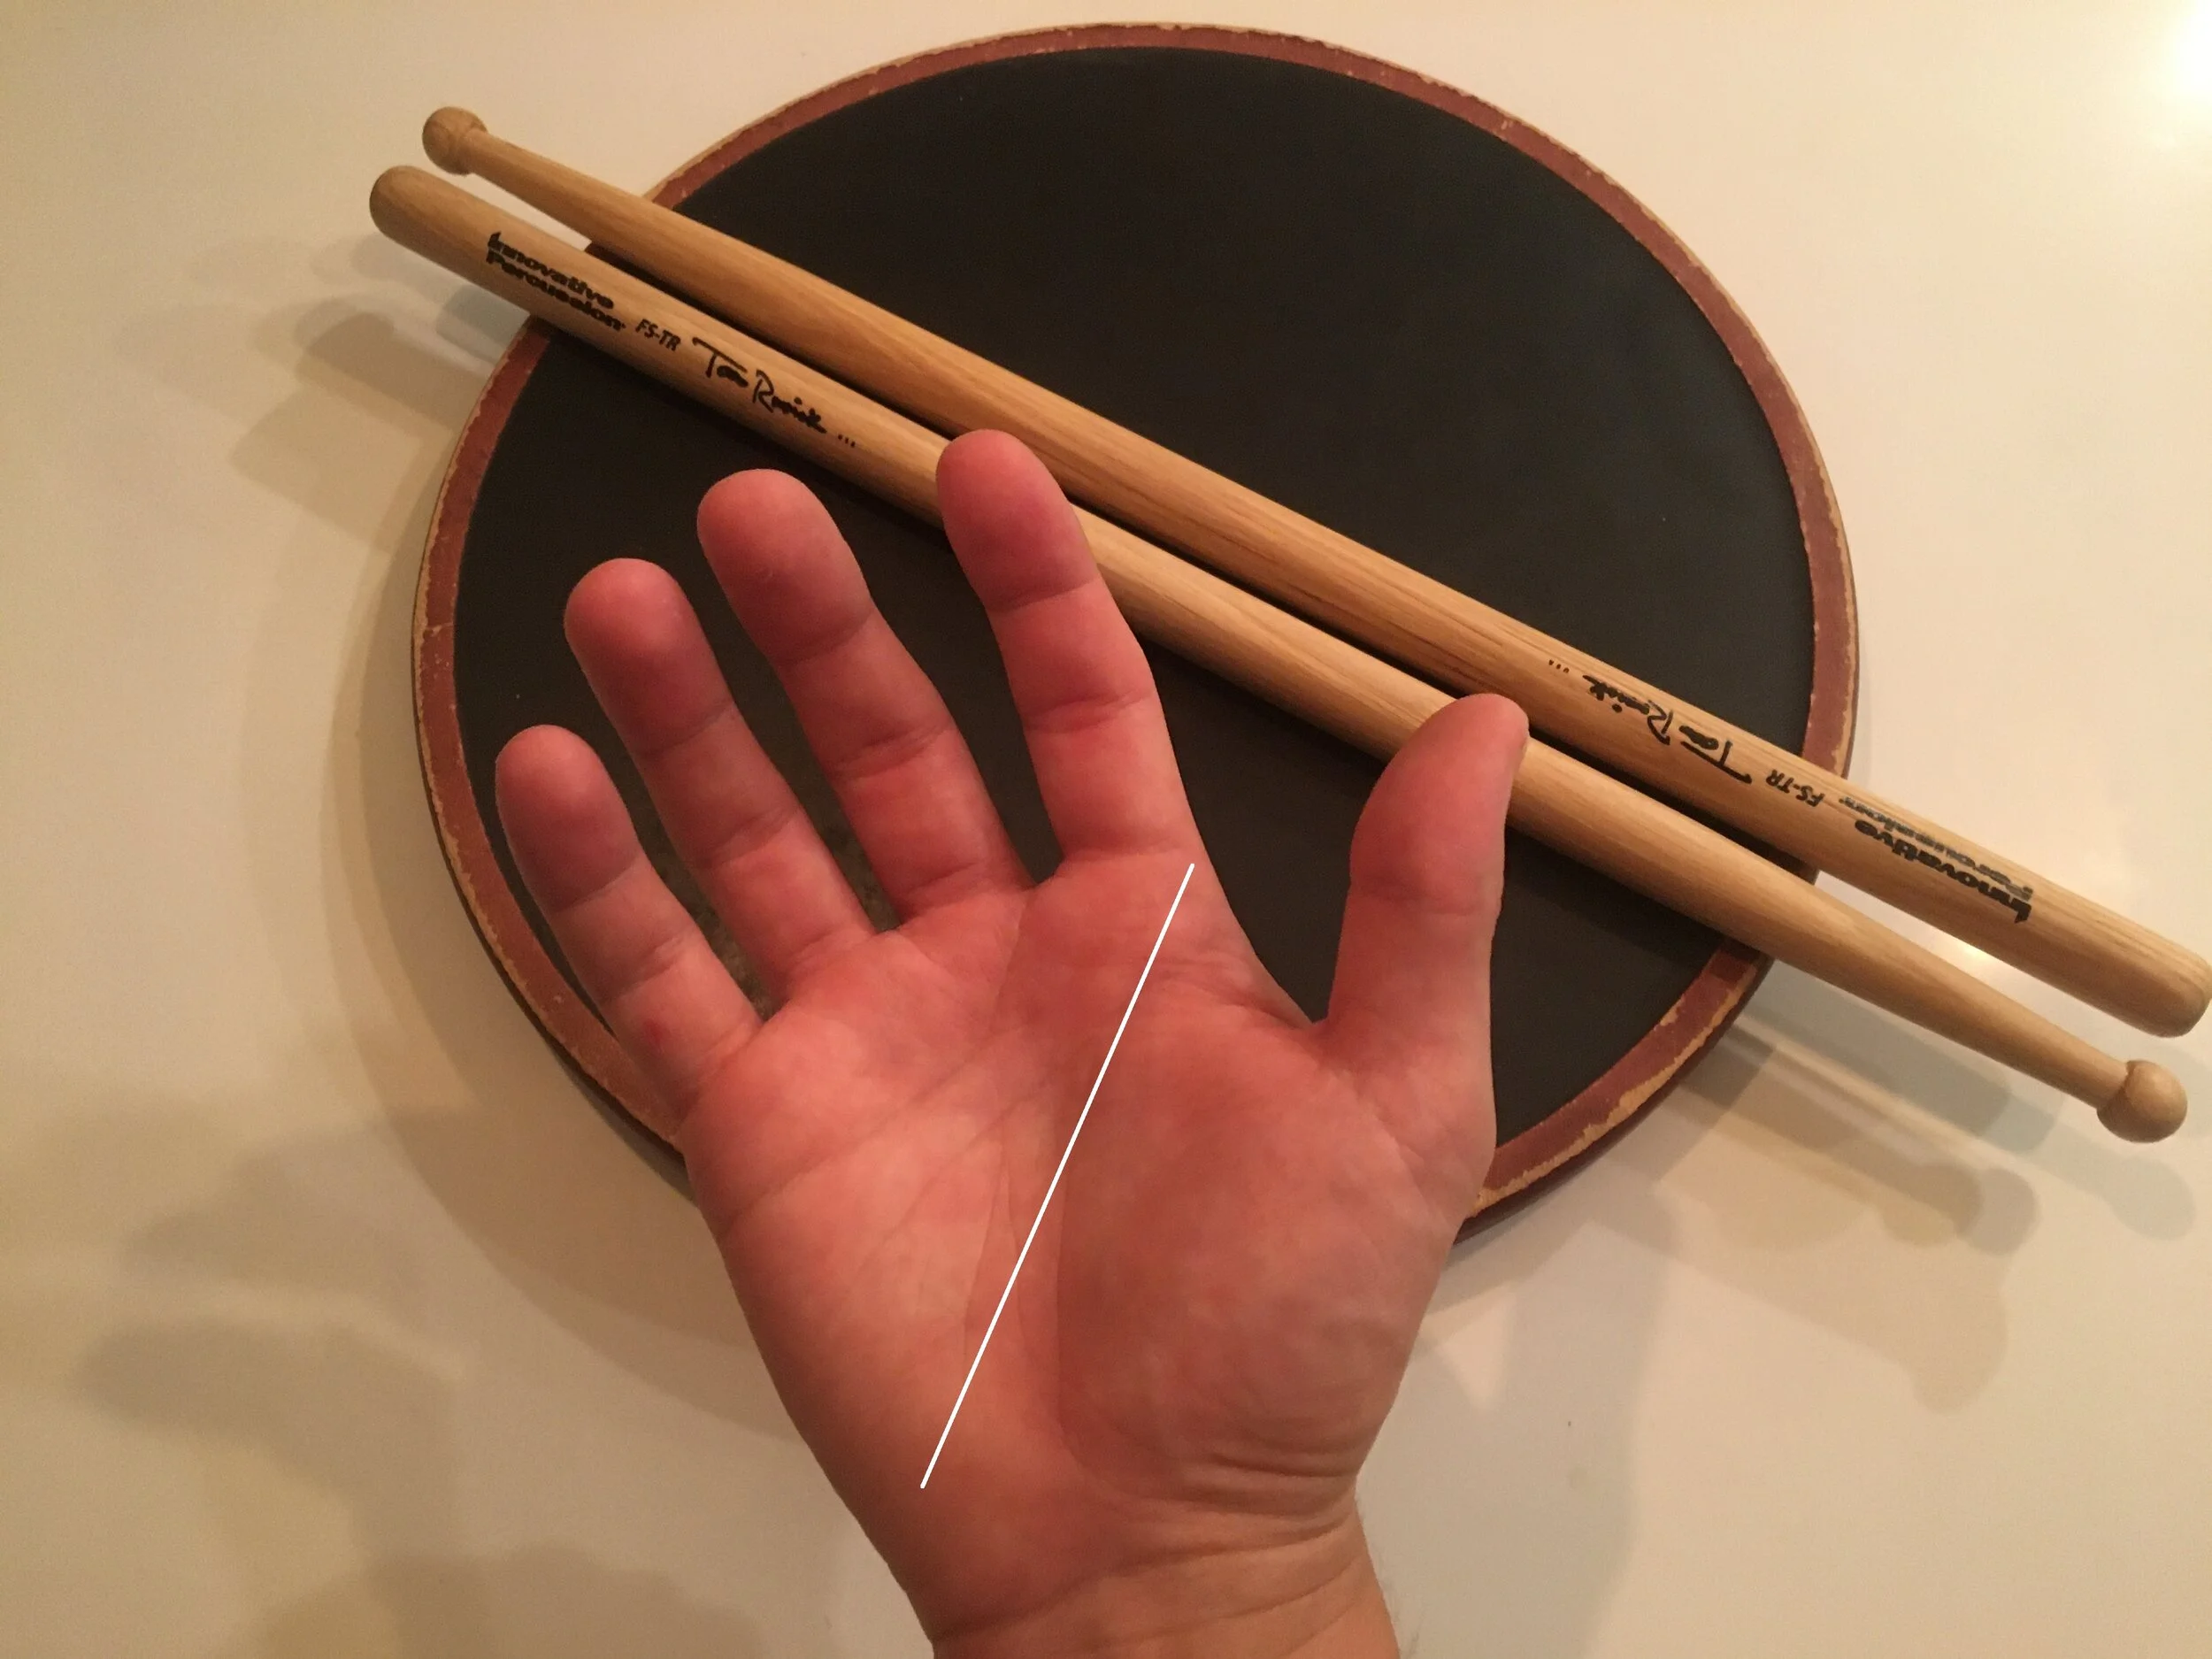
The line is approximately where your drum stick will go.
Place a drum stick in your palm along that line. Wrap all five fingers around the stick, with the pads (fingerprints) of each finger touching the stick. The thumb and index finger should be about 1/3 of the way from the back of the stick.
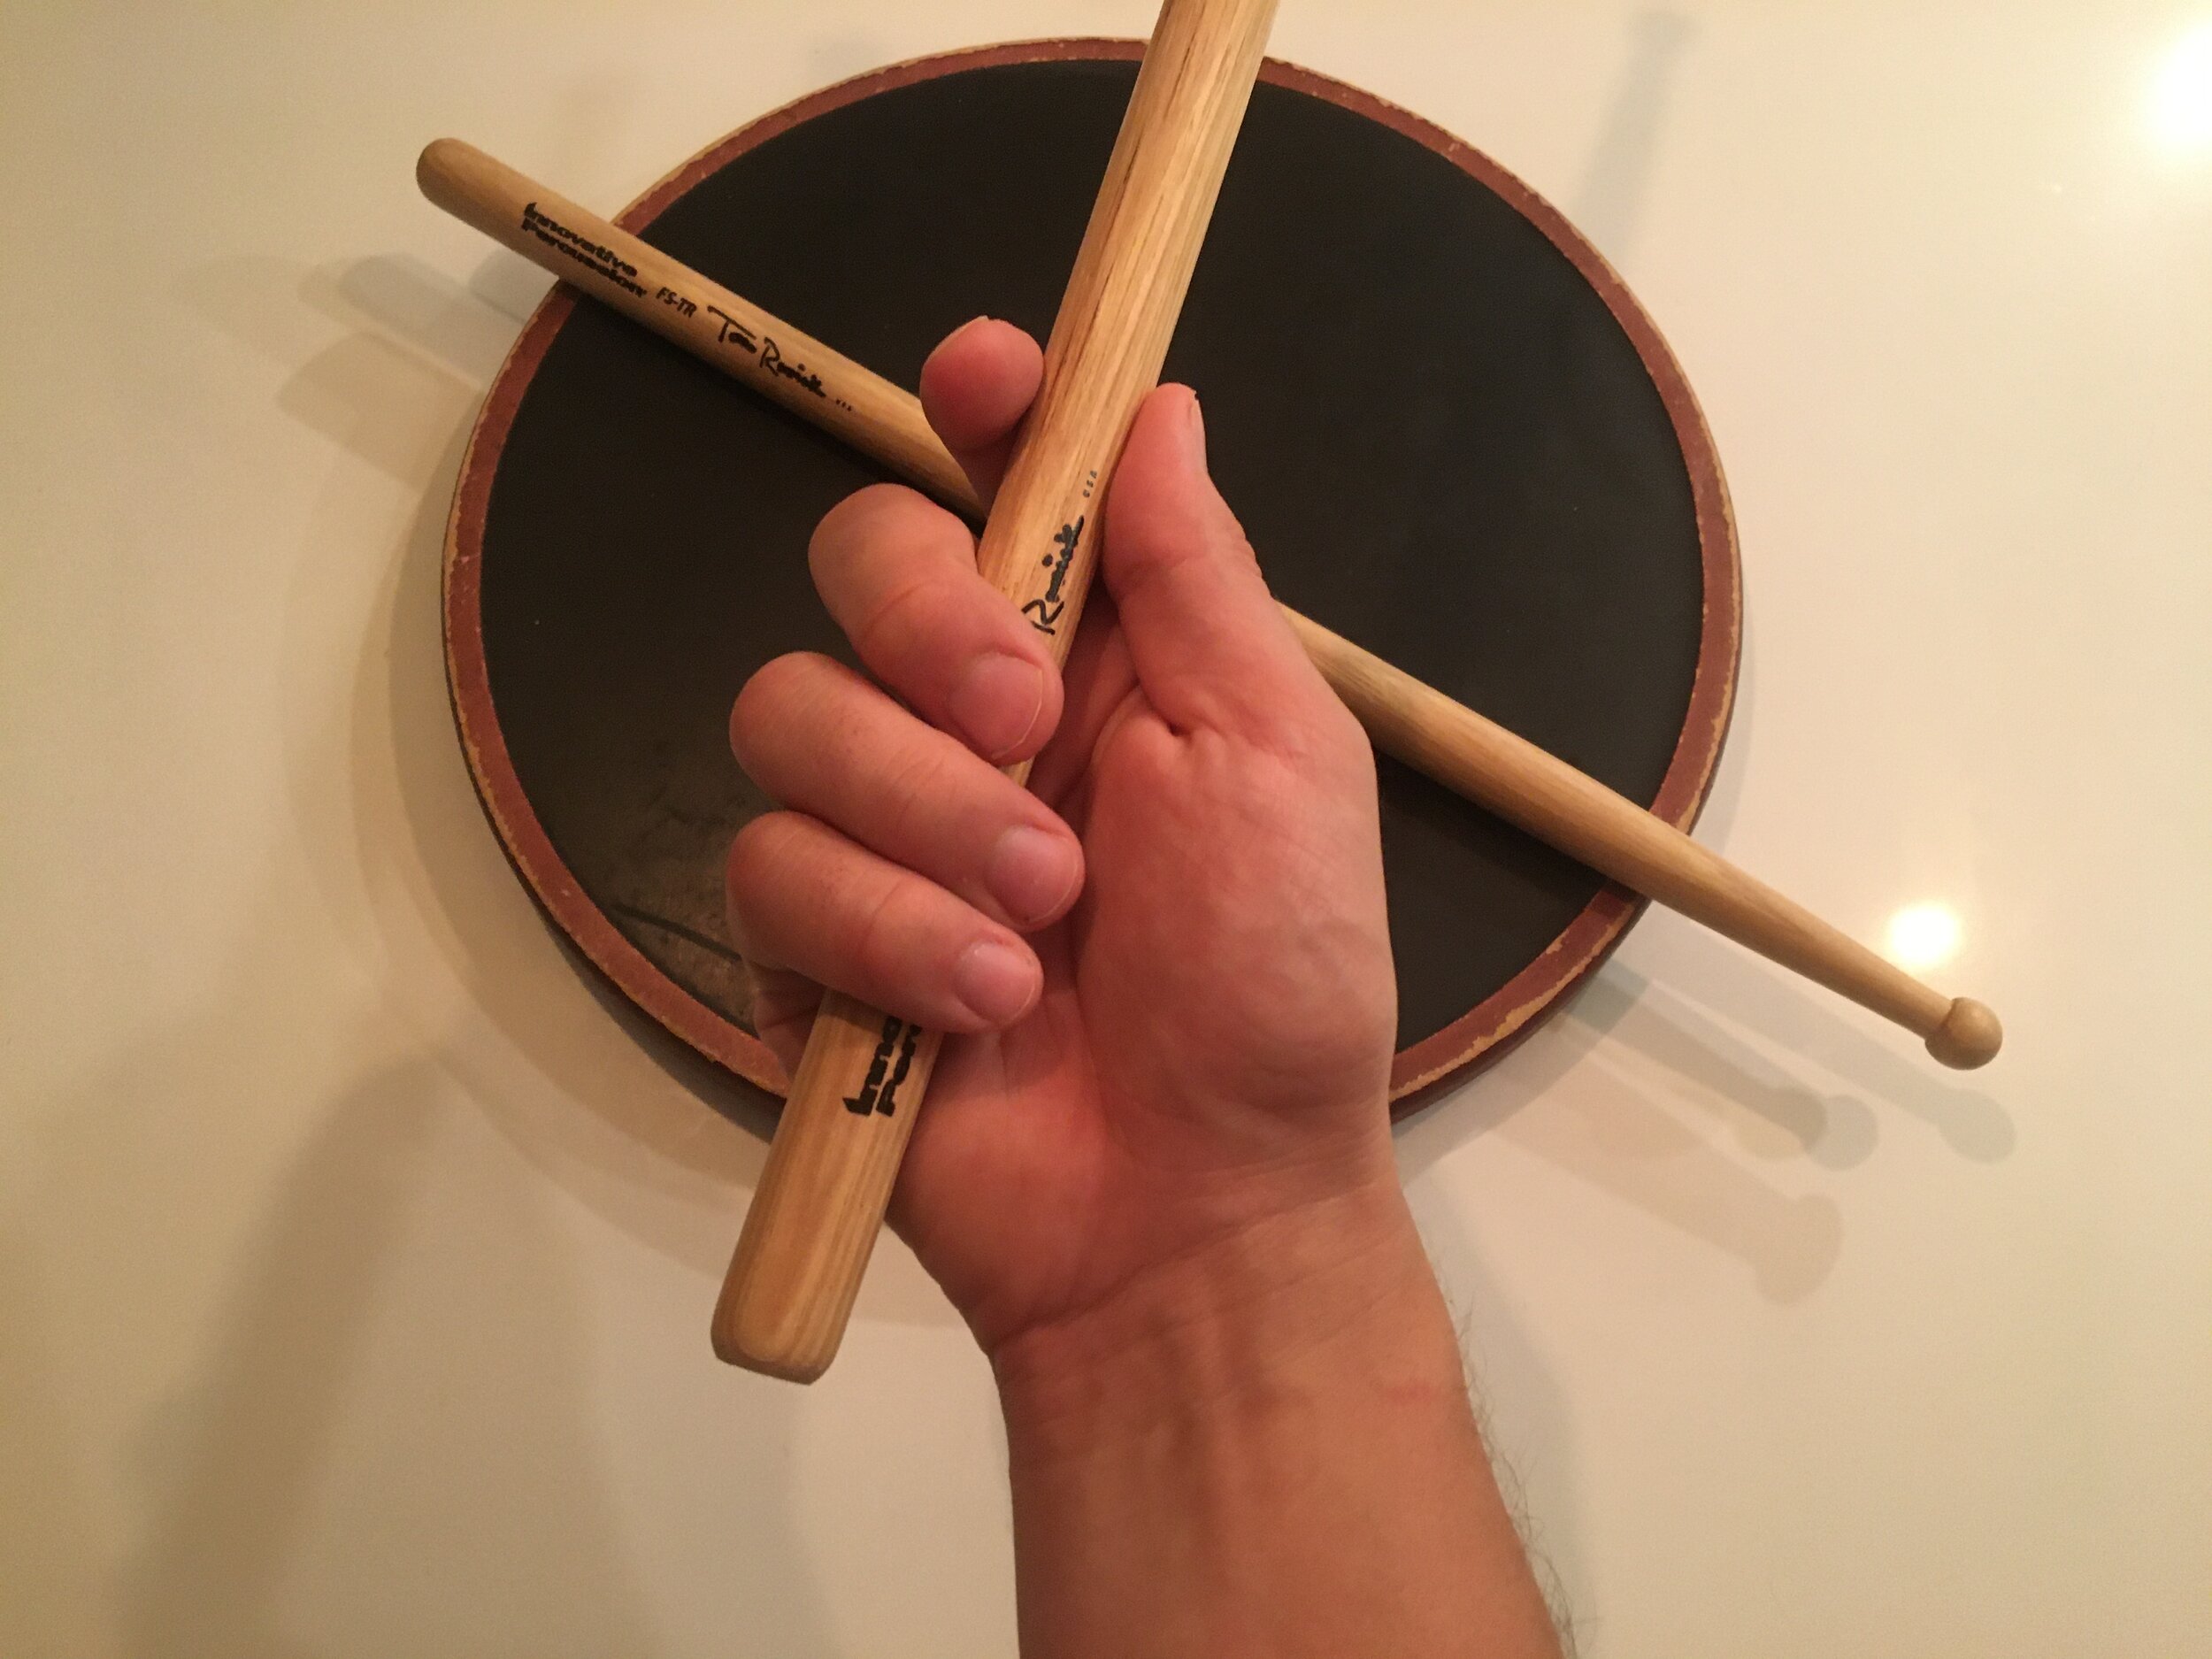
A small gap between index and middle finger is good!
Turn your hand over so the palm is facing downward. Pay attention to how each of your fingers is connected to the drumstick. Try squeezing with the index finger and thumb, then with just the middle finger and thumb, and finally with just the pinky and ring fingers. Now release all of that pressure, holding the stick just enough to keep it snug to your palm without any squeezing whatsoever.
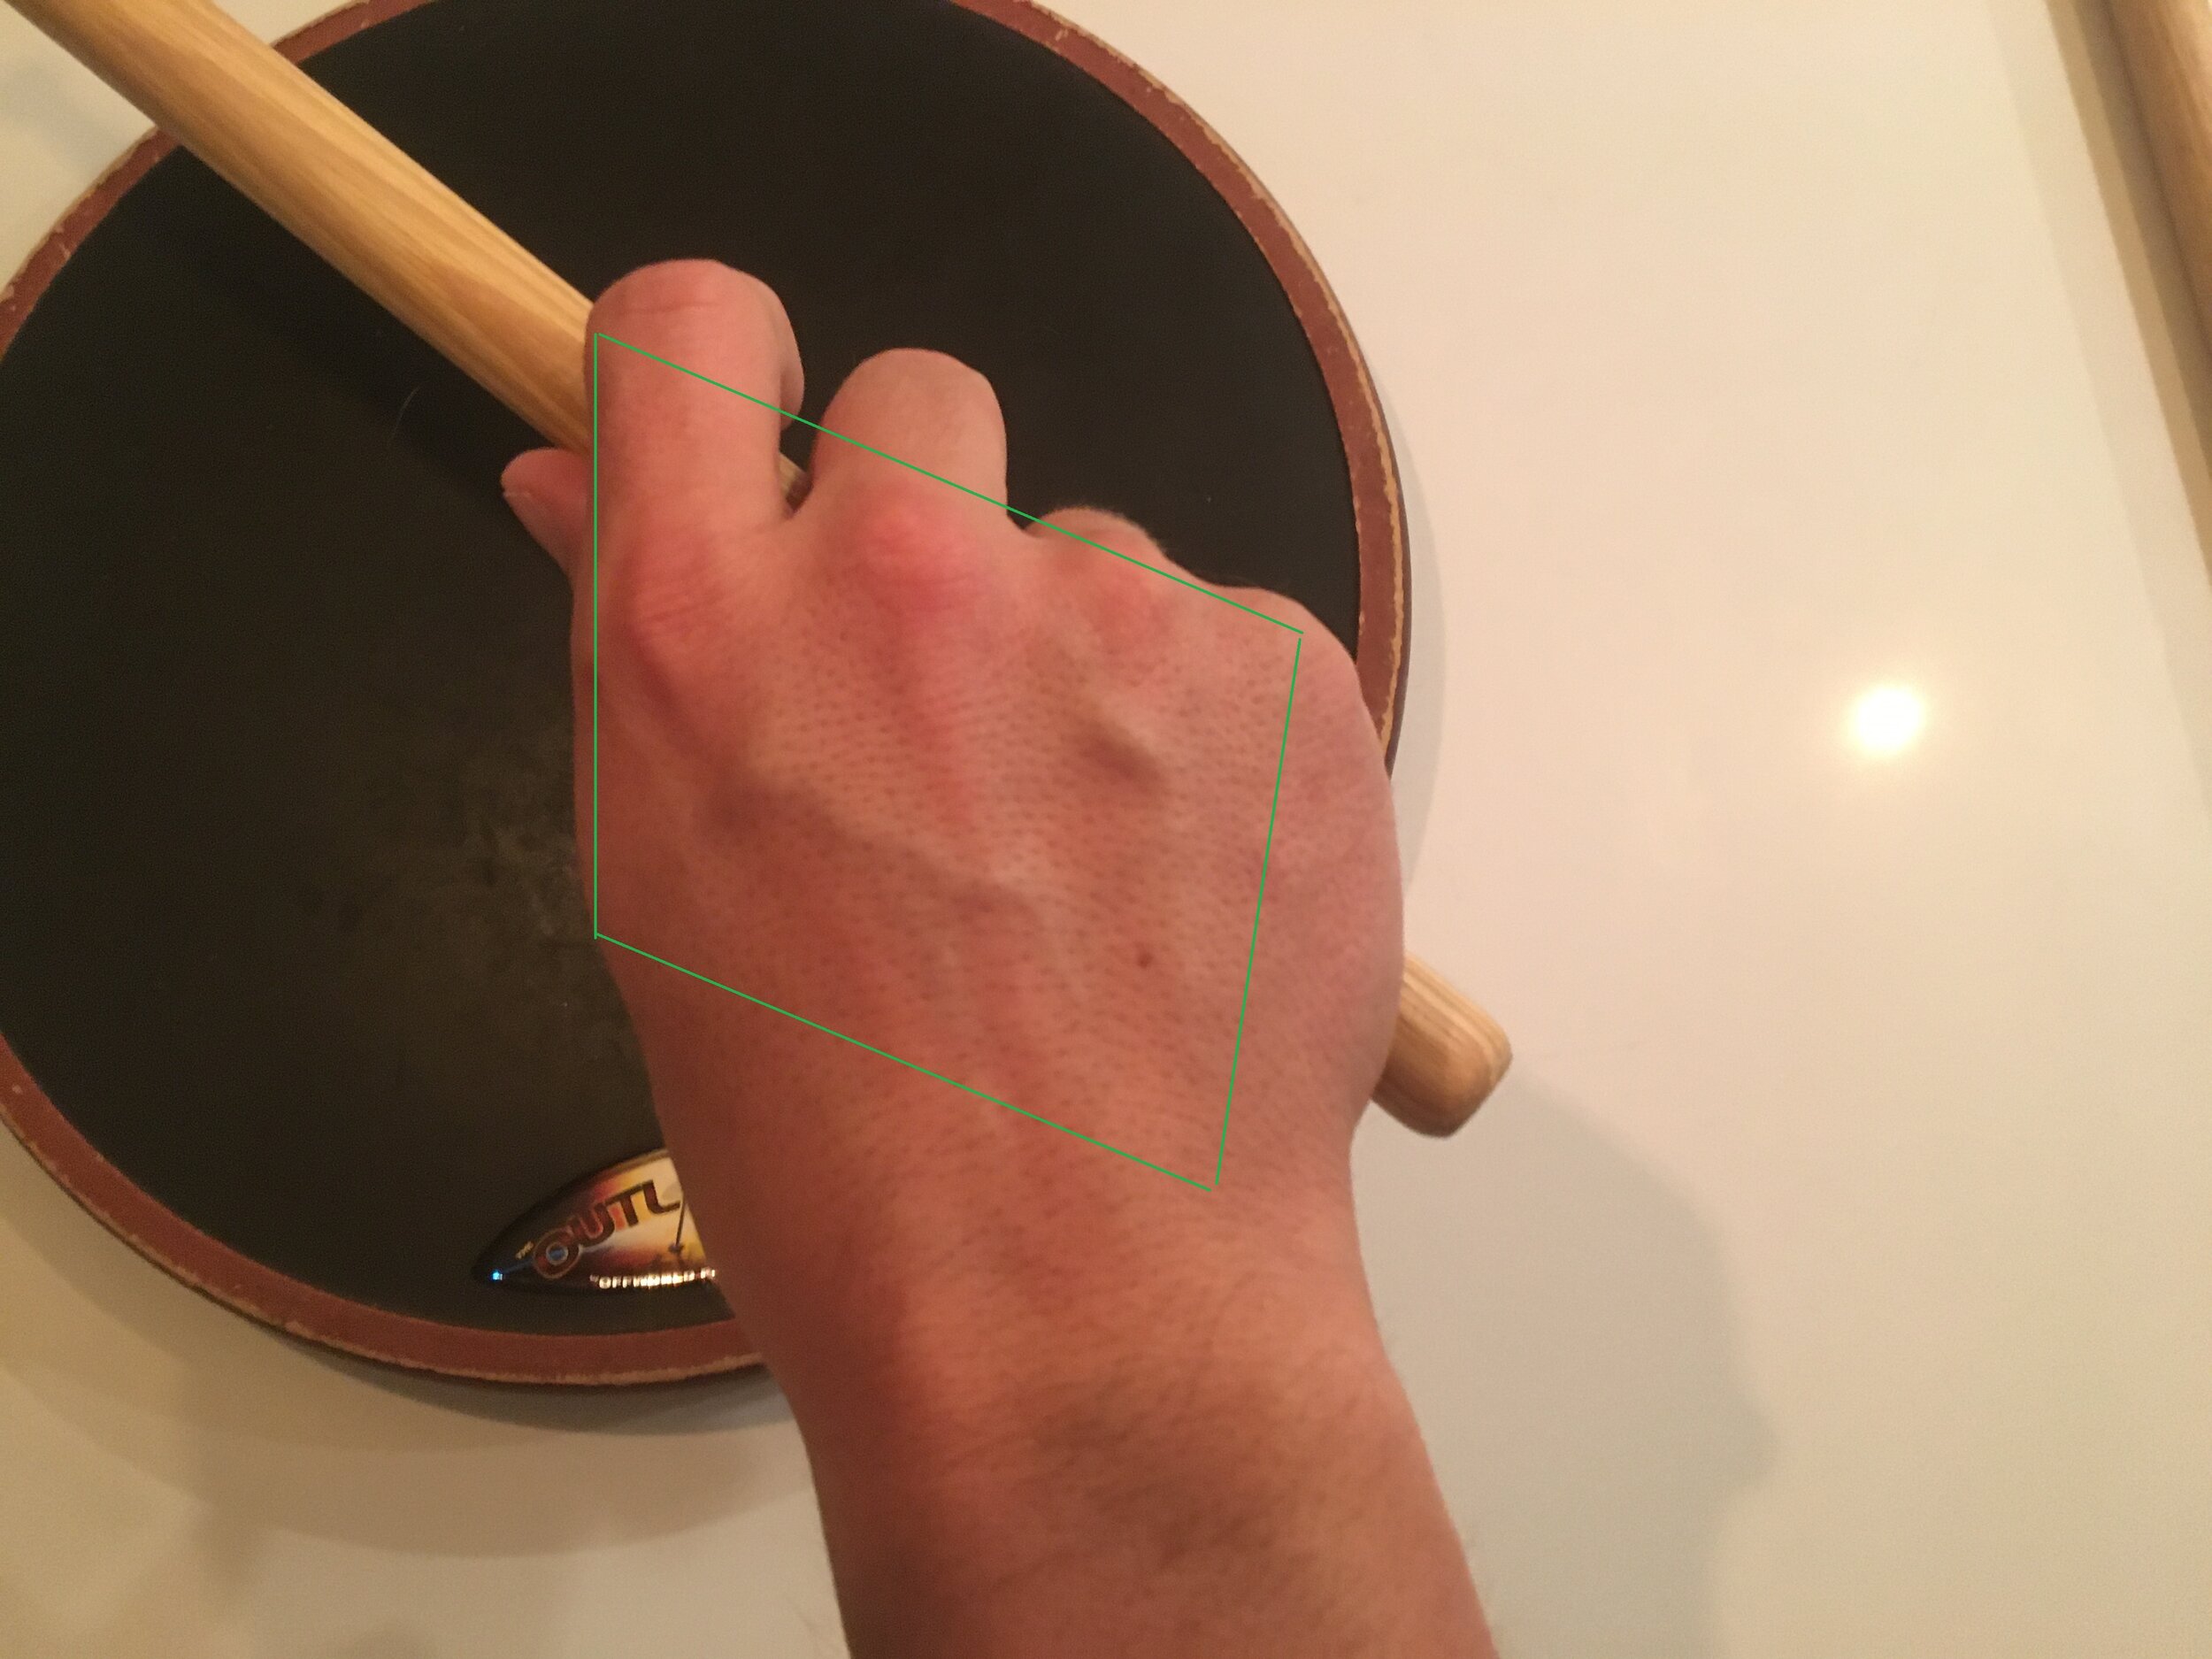
The “Diamond-Shaped” Hand (correct)
Notice how your hand makes a “diamond shape.” This is ideal because it approximates how your hand rests naturally when it is down at your side. Compare this to a “squared shape” hand you make when you clench a fist. The square is bad because it introduces unnecessary tension into the grip. Tension leads to diminished sound quality, less range of motion, and increased chance of injury. Use the diamond shape to promote good tone, full range of motion, and relaxation with less chance of injury.

The “Square-Shaped” Hand (incorrect)
Repeat the process in your other hand… and that’s it! Congratulations! You have now developed a solid foundation for matched grip that you can utilize in nearly all forms of drumming and 2-mallet keyboard playing. Enjoy!
Sticks used in this video: Innovative Percussion FS-TR Tom Rarick