Percussionists are responsible for playing so many different instruments. A basic understanding of the differences between them is crucial. Keyboard percussion consists of chromatic, melodic instruments with bars arranged in the same layout as a piano. By reading this guide, you will be able to identify each of the main keyboard percussion instruments and the differences between them.
(If you find this article useful, please consider purchasing some exercises and sheet music from the store!)
Marimba

This is a five-octave marimba. Notice the wide, wooden bars (brown rectangles on top) and the big resonators (black tubes on bottom).
The most distinguishing features of a marimba are it’s wide, wooden bars and it’s big resonators. The bars are usually struck with yarn or corded mallets with a rubber core. A good rule of thumb when selecting marimba mallets is to make sure that the material of the mallet is softer than the wooden bars themselves. One wrong strike with a hard mallet can mean a broken bar that will need to be replaced.
Marimbas come in a variety of sizes. The one pictured above is five octaves (C2 to C7). Most college percussion studios have at least one five-octave marimba, as lots of marimba literature is composed for five-octaves. High school programs generally have 4.3 octave marimbas (A2-C7), which covers most music written for band and orchestra. Marimbas come in other sizes as well.
Xylophone
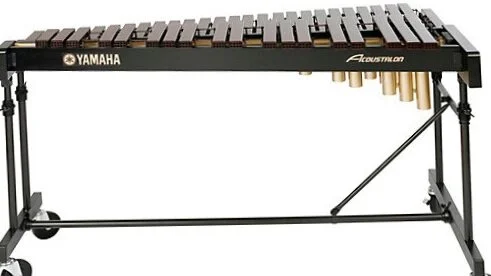
A 3.5 octave xylophone. Notice the bars are thinner than a marimba, and the resonators are smaller.
A xylophone is similar to a marimba in that it also has wooden bars. The primary difference would be that a xylophone is smaller in terms of range, bar width, and resonator size. This results in a higher pitched instrument with less resonance (in other words, the bars don’t ring as long after being struck). Xylophones are generally played with harder mallets than would be used on a marimba, but still soft enough as to not damage the wood.
It is worth noting that both marimbas and xylophones can be built with real wooden bars or with synthetic bars. Synthetic bars (as seen in this xylophone picture) approximate the same sound as the real thing, but are less expensive, more durable, and arguably more sustainable.
Vibraphone
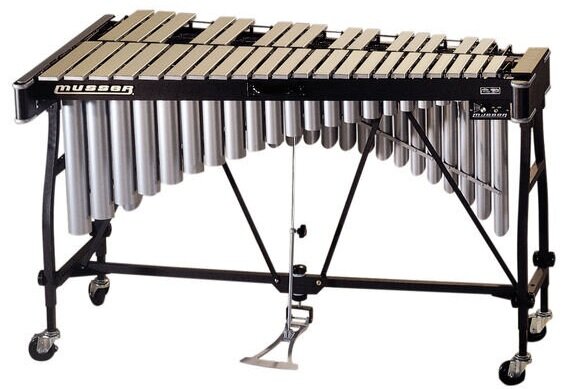
A three-octave vibraphone. Notice the metal bars and sustain pedal.
The first difference you will notice that distinguishes a vibraphone is the metal bars. The next thing you might notice would be the sustain pedal at the bottom of the instrument. This pedal, when depressed, allows all of the bars to ring. When the pedal is up, a felt pad presses against the bars from underneath, dampening the sound.
Vibraphones are characterized by their metallic, mellow sound. While marimbas are often played with yarn-wrapped mallets, vibraphonists often use cord-wrapped mallets. However, experimenting with either material on either instrument is encouraged, as long as the player is careful not to damage the equipment with mallets that are too hard.
One of the main new responsibilities for beginning vibraphonists to consider is note duration. Marimba and xylophone players (usually) only need to think about the initiation of their notes. Vibraphonists must also consider which notes they want to ring, which notes should be staccato (short), and everything in between. Phrasing as developed by your pedaling can make or break your sound on a vibraphone.
Glockenspiel (Bells)

A 2.8 octave glockenspiel. Notice the metal bars and the smaller size.
The last of the keyboard percussion instruments we will discuss is the glockenspiel. As you can see, the metal bars are similar to the vibraphone. The main difference is that the glockenspiel is in a much higher range than the vibraphone (in this case, F5-D8). Most glockenspiels do not have a sustain pedal, but some do.
It is worth noting that the glockenspiel sounds two octaves higher than written. In other words, if you see a C4 on the page, you will hear C6 when striking the instrument.
Many percussionists start out on a glockenspiel. The skills you learn as a beginner definitely translate to the other keyboard instruments. Spending time playing each instrument is really the best way to get to know how they operate and what makes each one unique.
Thanks for reading this guide! If you have questions or other knowledge to share with readers, please leave a comment below or reach out. Finally, while your here, check out some sheet music in the store!