LAB: SpiderTrap

This a description of my experience working on the labs offered by Black Hills Information Security called “Advanced C2 PCAP Analysis” and “RITA.” I completed these labs in May of 2022 as part of the “Active Defense - Cyber Deception” live class offered by John Strand and Antisyphon Training. If you want to do the labs yourself, check out their class here! The lab walkthroughs are also available on GitHub.

Image credit: Nathan Dumlao

This lab covers a tool called SpiderTrap that can be used to catch and slow down web crawling bots that attempt to enumerate your web server for malicious reasons. It does this by generating lots of random links for the spider to examine and waste it’s time with.

I began the lab by opening my virtual machine in VMware, which was provided by BHIS as part of the class downloads. I opened a terminal as administrator, clicked the dropdown menu and opened an Ubuntu shell. I changed directories into the location of the spidertrap installation (/opt/spidertrap) and ran ifconfig to determine my IP address. I then started the trap by running the following command:

python3 spidertrap.py

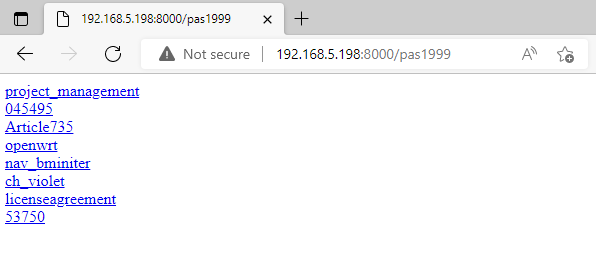
This displayed the randomly generated links, which just lead to more random links if they are clicked on. Below is a screenshot of the result. I then stopped the tool from running.

I then moved on to the next step of the lab, which was to start SpiderTrap again, but this time with a directory list enabled to make the links look like real directories, which further obfuscates that fact that this is acting as a trap.

A normal penetration test involves starting with an automated scan, where the pentester starts the scan and then lets it run while doing something else. If they run into SpiderTrap while the automated scan is running, this could either fill the pentester’s hard drive or completely exhaust the memory of the pentester’s computer. Either way, it is disruptive and can slow down a penetration tester or attacker, which gives time for network defenders to take further action to secure the systems.

You can learn more about SpiderTrap here. Thanks for reading!

LAB - Advanced C2 PCAP Analysis | Using RITA as an “Easy Button”

This a description of my experience working on the labs offered by Black Hills Information Security called “Advanced C2 PCAP Analysis” and “RITA.” I completed these labs in May of 2022 as part of the “Active Defense - Cyber Deception” live class offered by John Strand and Antisyphon Training. If you want to do the labs yourself, check out their class here! The lab walkthroughs are also available on GitHub.

These labs show two ways of analyzing packet capture data, also known as PCAP analysis. The “manual” way is by using tcpdump to look at SYN packets, while the “easy” way is to use an open source tool called RITA.

The first step of the “manual way” was to open a Windows terminal as Administrator. I then opened an Ubuntu tab, as seen in the image below.

Next, I moved into the directory where the pcap file was stored and ran the following command (see below) to analyze the file with tcpdump. As stated in the lab instructions, “the –nA option tells tcpdump not to resolve names (n) and print the ASCII text of the packet (A).” The “-r” option allows us to read the file, and piping it through “less” allows us to view the data section by section.

sudo tcpdump -nA -r covertC2.pcap | less

Running this command opens a tcpdump session. The information displayed here is certainly not easy to parse if you are just getting started looking at pcap data. The interesting data here is the SYN packets that are all 30 seconds apart. To see the SYN packets, run the following command:

sudo tcpdump -r covertC2.pcap 'tcp[13] = 0x02'

This filters the data by showing “all packets with the SYN bit (0x02) set in the 13th byte offset in the TCP/IP header (tcp[13]).” This confirms that the packets are all 30 seconds apart. We can also grep any instances of “hidden” using the following command:

sudo tcpdump -nA -r covertC2.pcap | grep "hidden"

This returns some random-looking data followed by an “=” sign. This indicates Base64 encoded data, which could be malicious or benign. Either way, it should encourage us to dig deeper and look into this data more. In this case, this data appears to be a malicious PowerShell command to “download and execute Powersploit, which then invokes a Metasploit Meterpreter on the system.”

Without a solid understanding of tcpdump and python, malicious code like this might go unnoticed on a network. An easier way to detect this type of code is by using an open source tool such as RITA.

The “beacons” tool in RITA sorts connections by the consistency of their “heartbeat.” A value of “1” is considered perfect, where a connection is happening at a consistent interval. The image above shows the destination IP of 138.197.117.74 with a nearly perfect “heartbeat score.” A consistent heartbeat is not inherently dangerous, but the egregious number of connections (4532) in this case is very suspicious. This is an indication of a beacon that is calling home to wait for commands from an attacker.

Another way to use RITA is to look at when specific requests are being made for certain domains. By clicking “DNS,” we can see that there were over 40,000 requests for a website called “nanobotninjas.” This is a strong indicator of a backdoor present on the network that is receiving (or waiting for) commands from an attacker.

Open source tools like RITA are great for visualizing data patterns over longer time spans. Understanding the data in this context allows defenders to see trends and take appropriate actions to protect their networks. You can learn more about RITA here. Thanks for reading!